Capturing a beautiful image used to require an expensive camera, but these days, you need little more than a smart phone to snap a quality picture. We’ve rounded up the best food photo tips on the inter-webs. Whether you’re just getting started with food photography or looking to polish your skills, follow these simple tips to ensure you get your food on it’s good side.

Use natural light (avoid the flash)
“Good lighting is the single most important criteria for good photography, and the very best light is indirect daylight—a shady spot on a sunny day is the holy grail of natural lighting conditions. It gives your food a bright, even glow, and doesn’t tint colors in the way that indoor lighting typically does.But when it comes to natural light, direct sunlight tends to be harsh, creating dark distracting shadows and making whites and light colors so bright that they lose any discernible texture and shape. If you’re shooting indoors, your best bet is to set up during the day near a window, outside the range of direct sunlight.” – Serious Eats, Guide to Food Photography

White Balance
In getting good color, your white balance is the best thing you’ve got on your camera. Your white balance is what tells your camera what color is white, and accordingly what all the rest of the colors in the spectrum are as well. Most cameras have a feature where you can choose a pre-set white balance for a variety of environments – sunny, cloudy, fluorescent light – or set your own. I keep a couple of white cards with my camera so I can set the white balance by them when the light changes or I move locations.” – Faith Durand, Food Photography: Tips for Newbies
If your food still looks a shade of blue, yellow, pink or green, most photo editing programs have a correction tool to fix it.

Backlight the food
“Make sure your main source of light is coming from behind the food and slightly above. You should see shadows under the front of the dish or plate. Sticking a plate in front of window light is a common way to photograph food on location. Extra tip: Try using a mirror opposite your main light source to pop some light back into the food.” – Zenologue, 8 Tips for Drool-Worthy Food Photography

Use white dishes
“Everything looks better on a white dish, and it tends to reflect the light better. I have a whole collection of interesting little dishes that I use occasionally, but they are more challenging to photograph well, and I usually end up again with my favorite white soup plate.” – Faith Durand, Food Photography: Tips for Newbies
Moisturize your dish
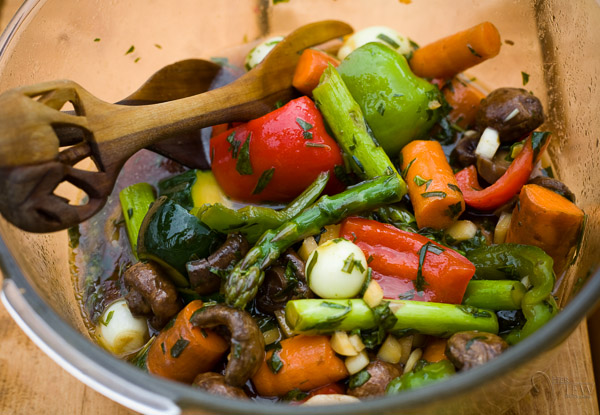
“When taking still-life pictures of fruit & veg a few misty bursts of water with an atomizer (Muji have a good selection) can transform a shot. Subjects that looked a bit lifeless will appear as if they’ve been plucked from a crisp, dewy garden.” – BBCGoodFood.com, How to Photograph Food
“To make vegetables glisten brush them with a bit of olive oil, or mist a salad with water. It will make them look fresher.” – Darlene Hildebrandt, 11 Quick Food Photography Tips to Make Mouth Watering Images

Use a tripod
“Stabilize your camera. If you can’t use a tripod, brace it against a chair, wall, or sleeping giraffe. The food isn’t going anywhere, so as long as the camera is still, there is no reason the shot should be blurry.” Michael Natkin, Best Food Photograph Tips from 3 Pro Photographers)


Vary the Camera Angle
“Just like human subjects can be photographed from more flattering angles, the same goes for food. It’s important to remember that the concept you see in your head might not always make the best photo. That’s one reason why I almost never shoot a dish from only one angle. Get the shot you think you want, but then take a few minutes to recompose and take another. Remember that an added benefit of shooting food is that it won’t get bored or frustrated with you while you take your time getting everything just right.” – Jeff Guyer, 15 Awesome Food Photography Tips
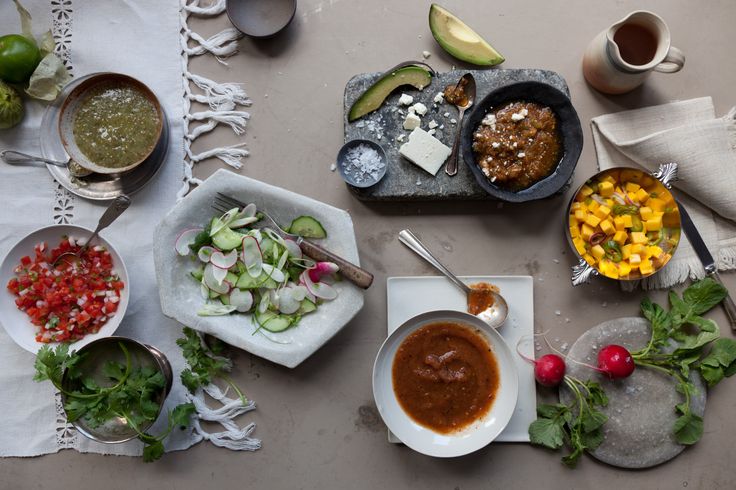
Create a landscape
“When thinking about food photography, don’t just consider the finished product on the plate or the people eating it. Look at the ingredients—perhaps there’s a beautiful photograph waiting to be made. Think about how to tell a story with food: Use messy spoons to convey movement, add drips and crumbs for emotion, and give the scene tension with compositionally placed ingredients.” – Penny De Los Santos, National Geographic Photographing Food

Keep it real
“If you’re making a pie and a little of the filling oozes out – leave it. If you are photographing a cake with a slice removed, leave the mess, the crumbs, the drip of jam or cream. This gives food life.” – Mari Williams, Food, Beautiful Food Styling Tips from the Experts

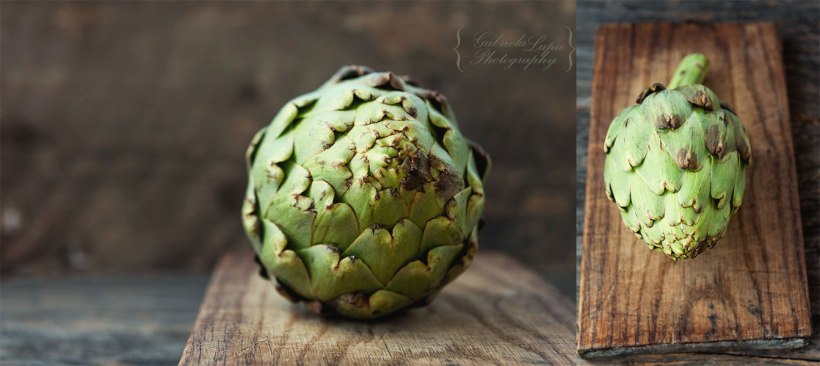
Play with depth of field for soft edges
Try using a shallow depth of field to focus on a specific section of your food (shallow depth meaning only a small portion is in focus), maybe a corner or closest piece of a group and the rest of the food/image will gradually blur out of focus. This creates nice soft edges and makes the focal point really pop in the picture. On most cameras this is achieved with the macro setting.
“With smaller cameras and camera phones, try placing items close to the lens to create a ‘blurry frame’ around your main subject. This will add visual impact to the food that you’re shooting.” – Adorama, Food Photography Tips
If you can’t get this effect to work in the field, many photo editor software programs & apps offer a blur vignette option you can size and center around your focal point.
BONUS TIP: Backgrounds
“Keep it simple: it’s still the food that’s the hero. Try to avoid colors or patterns that clash with your food. You can use a chalkboard, a baking pan, or fancy linens or paper that you can put under your scene. Cutting boards or pastry boards also offer a great background for photos. Something about a marble pastry board always looks good in my opinion. For a rustic look you can build your own small wooden table. It’s easy to move, store and put it anywhere in the house.” – cookingwithoutlimits.com, Food Photography- Tips for beginners
Ready to shoot? Test these tips at the Epic Eats Celebration, September 30th as professional chefs from the DFW area will be competing for the “Photo Favorite” of the day. See the chef line-up here.
